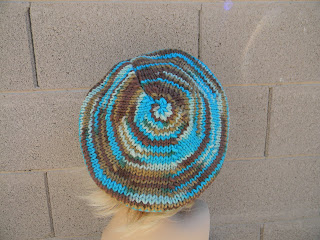
Berets and Beanies

My latest project!
I can't use circular needles so I adapted a pattern to use regular needles

Here is the pattern:
Now you will need to use some imagination, no need to follow this pattern exactly but if you get the idea you can adapt it to different weights of yarn

I used size 10 needles and a bulky weight yarn

Cast on 63 sts
Knit 8 to 10 rows in rib (K1 P1)
next row: switch to stocking stitch
1. k8 m1 in 9th stitch, repeat till end
2. purl
3. k9 m1 in 10th stitch, repeat till end
4.and all even rows Purl
5. k10 m1 in 11th stitch, repeat till end
7.  k11 m1 in 12th stitch, repeat till end.
Continue in stocking stitch  for about 4 inches
start decrease.
all even rows are in purl

1. k12, k2 tog repeat till end
3. k11, k2tog, repeat till end
5.k 10, k 2 tog repeat till end
follow this way till a few stitches are left
runt the thread through the stitches and sew up the sides!

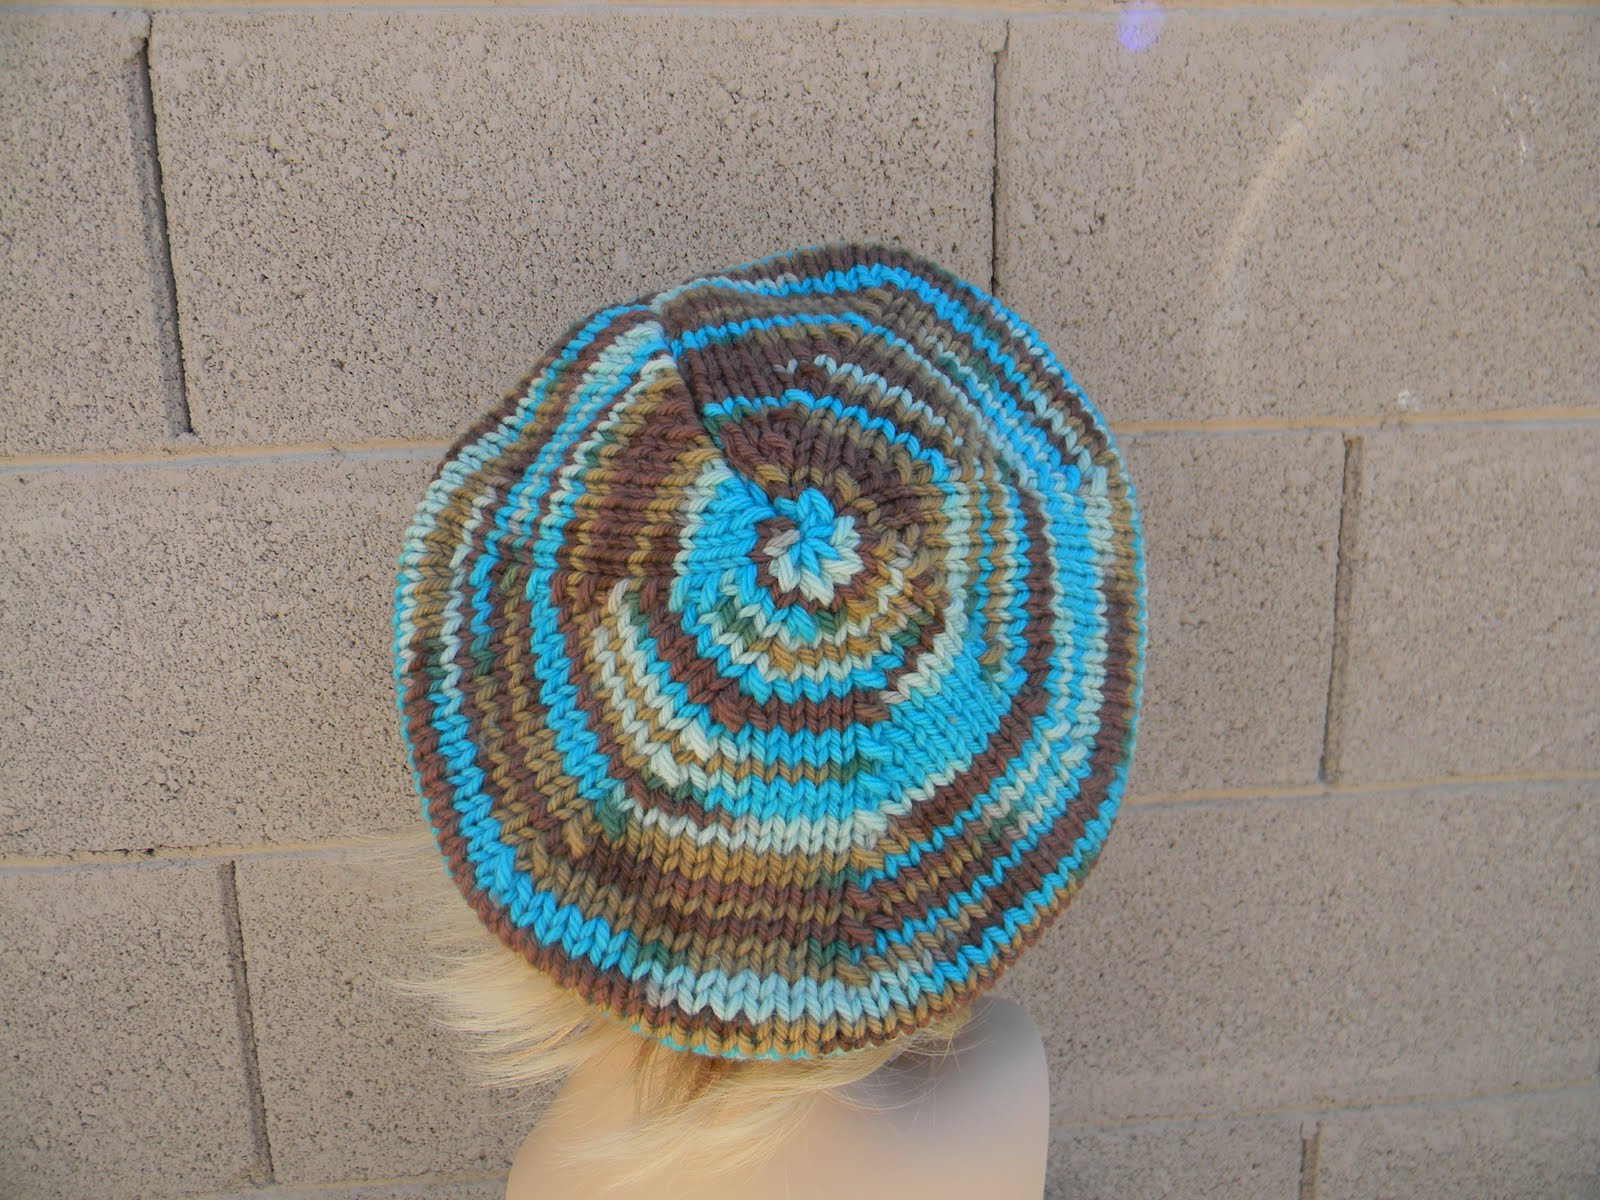
In the above beret, I knitted the band by casting on 12 sts
k1p1, k1, p1, k 4 (for the cable) p1K1, P1, K1
as presented on the wrong side
cables every 8 rows.
Knit as long as your head is wide
cast off and pick up 63 stitches and continue using the basic pattern omitting the ribbing
EASY!


If you don't knit, you can buy my hats HERE

Comments

Noah's Crew said…
I really like the orange hat even though I'm not big on wearing anything on my head :)
Unknown said…
What kind of yarn did you use for the blue/brown hat? I love that colorway (and the hat looks fantastic, by the way).
lucinda said…
some super chunky yarn i had stashed away!!!
thanks Jessica...its such fun to knit hats!
Unknown said…
I love this pattern, used it as an opportunity to learn how to cable, and I've fallen in love with the hats. It's also such a simple pattern that I have managed to memorise it after just one go through, although I do use stitch markers to mark the increases and decreases.
Anonymous said…
designs by clients are not always the easiest to understand. Fortunately there are solutions to help you create designs that manufacturers can read, so you get the beanies that you want. beanie maker
gracenotes said…
Could you please explain what you mean by the ending instruction on this pattern: "follow this way till a few stitches are left, run the thread through the stitches and sew up the sides." Follow what way? Like Knit 9, K2 tog, K8, K2 tog etc? or back to Knit 12, K2 tog, K11, K2 tog, K10 K2 tog etc?

Thanks so much!!

Popular posts from this blog

2 needle fingerless gloves

This is an easy pattern that can be adapted according to your skill. I used worsted weight yarn and US 5 needles. You need just over 50gms of yarn. I also found that knitting them both at the same times ensures that they bout turn out the same ! Cast on 42 sts Knit 20 rows in k2 p2 rib on the 20th row place markers this way: k20 place marker, k2, place marker, k20 the 2 sts between the markers will form the increase for the thumb. Switch to stocking stitch (1 row K - right side- 1 row P - wrong side) Knit to marker, (20 sts) knit twice in the next stitch and in the one after that (the sts between the markers) K20 next row and all wrong side rows, Purl Knit 20 sts (you have reached the marker) knit twice in next stitch, K2 (till next marker) and K twice in the stitch before the marker K20 Continue this way, always increasing a stitch at each marker till you have 16sts between the markers. k 2 rows then with right side facing, k20, CO 16, k20 (shaping the thumb) nex

Hand Knitted Baby Cardigan Pattern

By Popular Demand! This is in one size only - takes for ever to figure out other sizes! For chest 10" - finished measurements about 14" Sleeve 3" You will need: 2 balls of a soft yarn that woks with 3.25mm (US 3 Needles) A button tension is 25sts and 50 rows for a 4x4 inch square If you are a beginner you may not understand this pattern - for more experienced knitters, I am sure you will see the 'pattern' of the decrease rows forming the raglan) I think this was originally a Debbie Bliss pattern i had written down somewhere so please forgive me if there are any mistakes - as i keep saying, I am hopeless at writing down patterns and i just had some notes on a scrap of paper! Back cast on 45 sts knit until back measures 3" ending with a wrong side row cast off 4 sts at beginning of next 2 rows leave remaining 37 sts on a spare needle sleeves (I  knit both at the same time) cast on 29 sts K 7 rows increase:* k3, m1, k to last 4 sts m1, k3

Straight Needle Sock Pattern

I dont like using circulars - and this is an easy pattern with just one seam up the back and the foot. Straight needle sock pattern MATERIALS: size 5 needles,(3.75mm) 100gms worsted weight yarn Abbreviations K – knit P – purl Tog – together PSSO – pass slipped stitch over Top of sock Cast on 42 sts, Work in K1 P1 rib for about 4 inches or for a high as you would like the socks to be Start shaping the heel: Knit 11 sts, Turn : knit on these 11 sts only for 16 rows, ending with a purl row Make heel Row 1:-K2, k2tog, k1, turn, Row 2: - slip1, P3, turn. Row 3:-K3, K2tog, K1, turn, Row 4: slip1, P4, turn. Row 5:-K4, K2tog, K1, turn, Row 6: slip1, P5, turn. Row 7:-K5, k2tog, K1. You have 7 sts left Pick up 10 sts on the side of the heel (the part you have just knitted), and knit them. Knit across the  sts left on the needle Turn and knit on the 1 st 11 sts only for 17 rows ending with a knit row Make the next heel as follows: Row 1: P2, P2tog, P1, turn, Row 2: slip1, K3, turn. Row3:- P3,